This one’s a gorgeously sticky one; beautiful caramel rippled through a classic chocolate traybake, it’s an absolute dream. I decided to get back to what I love best this week, making simple, quick and deliciously easy bakes. Fancy cupcakes and cute cookies are all well and good, but I absolutely adore boshing a few ingredients together in a short space of time and creating something delicious. So I returned to a favourite – the caramel chocolate brownie. As I type, it’s just cooling next to me, begging me to cut a chunk off and try it… oh ok, why not… brb…
Caramel Chocolate Brownie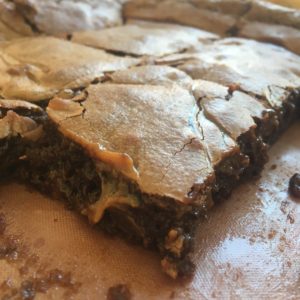
Ingredients
200g dark chocolate – half for melting, half for chunking
150g baking spread or butter
2 eggs
150g light brown sugar
100g plain flour
1 tsp baking powder
9 tsp caramel (I use a tin of Carnation caramel, but you can use whatever you can find!)
Method
- Preheat your oven to 180°C/160°C fan/Gas Mark 4 and line an 8″ square baking tin with baking paper or your reusable baking sheet strips.
- Pop a heatproof bowl over a small pan of simmering water and melt your butter and 100g of chocolate, mixing until it’s nearly melted, then remove from the heat and stir until it’s combined.
- Beat the eggs and sugar with a hand or stand mixer on medium high speed for about three minutes, until the mixture’s light.
- Add your flour and baking powder and mix on a lower speed until nicely combined.
- Pour in the chocolate mixture, stirring to make sure it’s all mixed together.
- Add the chocolate chunks and mix in.
- Pour your chocolate batter into the baking tin.
- If you’re using tinned caramel, give it a good stir first, to loosen it up.
- Drop teaspoons of caramel in three rows of three, to make nine spots, then slowly and carefully run a knife through them to swirl into the chocolate mix.
- Pop it into the oven to bake for 25-30 minutes. It will still be a bit wobbly, like a normal brownie, when it’s ready. The sides will be beginning to crack and you’ll see the edges beginning to crisp.
- Let it cool in the tin for 15 minutes, then lift out onto a cooling rack.
- If you want nice, clean cuts, leave it to cool completely, otherwise, tear into that bad boy like your life depended on it!
p.s. It will sink on cooling – don’t worry, that just means it’s got a gorgeous sticky centre… yum.
?❤?