Wondering exactly what tiffin is? Well, mix together some crushed biscuits, dried fruit, syrup and cocoa, top with gorgeous melted chocolate and that’s tiffin! Apparently it was invented in the early 1900s in Troon, Scotland. All I know is that it’s the ultimate fridge cake.
Many years ago my mum taught the Vellacott family’s children and was given some tiffin as an end of term gift. After getting her hands on the recipe, this tiffin became known as Vellacott Tiffin – they probably have no idea, but it is by far the best tiffin I’ve ever tasted. A teeny amount of patience required when chilling the layers, but so worth it, it’s a fab bake. Or non-bake, rather.
Vellacott Tiffin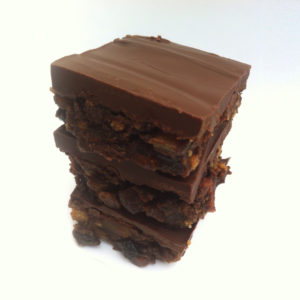
You’ll need an 8 or 9 inch square brownie pan
Makes 16
Ingredients
500g digestive biscuits
250g soft baking spread (or butter/margarine)
2 tbsp golden syrup
2 tbsp cocoa
350g dried fruit – whatever you like! Just cut up with scissors so the pieces are evenly sized. You could use dried apricots, apple, mango, raisins. Mixed bags of berries work nicely as well.
400g chocolate (I usually use 200g dark chocolate and 200g good quality milk chocolate)
Why not mix it up and make it seasonal – dates and mixed peel at Christmas, dried strawberries and blackcurrants in the summer, or add chopped nuts, mini marshmallows, mashed up maltesers… it’s really up to you!
Method
- Line your pan with baking paper or silicone sheets – this is essential for getting it out when it’s done!
- Melt the margarine, golden syrup and cocoa either in a large saucepan, mixing to combine.
- Whilst all that’s going on, smash up the biscuits. Pop them into a plastic food bag and wrap in a tea towel. Then go to town smashing them any which way around your kitchen! Whack them with a rolling pin, or beat them up on the counter. Smash them to a fine crumb, but leave some larger chunks for added texture.
- Use scissors to cut up the dried fruit into evenly sized pieces, probably about the size of a raisin.
- Add the fruit and biscuits to the melted mixture and mix well with a wooden spoon. Bash up any remaining larger biscuit chunks.
- Tip into your brownie pan and press down firmly. Use the bottom of a drinking glass to make sure it’s even and well packed down, as you would when making a cheesecake base. It needs to be really well compacted so it all holds together.
- Chill in the fridge for an hour, or until firm.
- Once firm, melt the chocolate in a heatproof bowl above a pan of simmering water.
- Mix the chocolate and pour over the chilled biscuit mix. Spread out evenly using a silicone spatula or palette knife.
- Chill again for about an hour – just before it’s completely set, cut into 16 pieces – it’s easier to cut if it’s not rock solid! Chill again if you like, although once the family spot that it’s been cut, it’s obviously up for grabs!
?❤️?